curiousPJ

joined 1 year ago
[–] curiousPJ@lemmy.world 4 points 2 weeks ago

Here's the issue I have with your position... AI is such a generic term it's difficult to have a fulfilling conversation using it but in my field a form of AI like machine learning is going to eliminate an entire sector of manufacturing... Boutique precision machined components have been thought as an impenetrable wall against AI but it's basically the same lackluster defense used not long ago about Generative images couldn't produce hands properly... It's not a matter of if but when.

Imo, the catastrophe happens when a successful AI scales. Or perhaps rather how suddenly a successful AI model will bury the existing system into irrelevancy. Boeing and most aerospace manufacturers have a machinist union but none of that will protect against a future where people are no longer necessary.

I don't think it's wrong to have AI eliminate jobs but it shouldn't come without warning. I think it's rather forward looking to be monitoring ongoing AI projects and establish contingencies for folks who will become displaced by it's rapid spread.

[–] curiousPJ@lemmy.world 2 points 2 weeks ago (1 children)

Trying to get capto systems for the multi-task lathes and zero-point pallets for the mills. I do prototyping and it's the only way to stay sane.

[–] curiousPJ@lemmy.world 9 points 1 month ago (3 children)

If your power consumption is actually 250 then go for a 500w PSU. You'll get better efficiency.

Anandtech (rip) used to be my go-to for PSU efficiency curves.

[–] curiousPJ@lemmy.world 41 points 3 months ago (1 children)

Maybe for the generic cat/dog image sharing boards but niche topics like machining are still thriving.

[–] curiousPJ@lemmy.world 4 points 3 months ago

3am... Need to be up in 4hrs...

Imma need me some 4 fairy soup.

[–] curiousPJ@lemmy.world 3 points 3 months ago (2 children)

I’m pretty sure they would have to upload millions of pictures of their own creation first.

From the YouTube guides in generating your own Lora models... Naa just a couple reference poses and it's ready to go.

[–] curiousPJ@lemmy.world 1 points 4 months ago* (last edited 4 months ago)

a yes, the ~~tuned~~ mass damper.

De-vibe bars work in a... uh.. similar manner.

[–] curiousPJ@lemmy.world 6 points 4 months ago

Somehow I get the feeling Valve still had some lingering feelings about the failure of Valve's TF2 comp and they're trying to right their wrongs.

[–] curiousPJ@lemmy.world 6 points 4 months ago* (last edited 4 months ago) (1 children)

I wonder if that shares the same physics as silvent's compressed air guns.

Silvent’s air nozzles reduce the sound level when blowing with compressed air compared to blowing through open pipes. This is due in part to the reduction in noisy turbulence from using Silvent’s air nozzles, and also because of the nozzles’ special design. Silvent’s air nozzles pass the compressed air through small holes and slots, which raises the sound to frequencies beyond what the human ear can perceive. This allows us to make blowing with compressed air both quiet and efficient.

Could use an even quieter compressed air gun

[–] curiousPJ@lemmy.world 2 points 4 months ago

I feel like it's more "thank us for believing in the right god"

[–] curiousPJ@lemmy.world 28 points 4 months ago (41 children)

Not sure what else this meme is doing other than actively creating a bigger divide between the genders...

[–] curiousPJ@lemmy.world 3 points 4 months ago

https://www.newegg.com/p/N82E16826100006

Neural Impulse Actuator or brain-computer interface.


There's so much untapped potential with a probing system and macros that aren't being utilized at all.

This video demonstrates how powerful a quality machine and probing can be towards a future of automation and simplifying incredibly difficult setups.

What gets me unsettled but also inspired is... This isn't entirely limited to the machine tool or probing system demonstrated on the video. We can do this NOW. Existing machines are entirely capable of exploiting their probing systems beyond their usual simplistic usage (part pickup, measurement). And the only thing really lacking is the brains to figure out all the heavy duty math.


I thought this was an extremely insightful documentary about why "Made in Japan" speaks volumes about quality versus the "Made in USA" counterpart. We as machinists are an intimate and integral component to the quality chain. Look around you, Japanese machines and tools dominate the precision market. Okuma, Yasda, Makino, Mazak, Mitsui-Seiki, dmg Mori (the Mori Part at least). While All American brands with the exception of Hardinge are left as a 'value' brand.

I never really liked the phrase "it's good enough". It always gives the impression to me that they've never really had to put something together and have it perform. I hear this all too much in job shops that make parts rather than assemblies. Never in Tool & Die. Sure, the component has a .010" tolerance but if the machinist was to hold everything within .001 or less, it makes assembly work a lot more consistent and predictable.

The linked video is part 2 of a 3 part video series.

Here is part 1 youtube

part 3 youtube

So what's your thoughts on quality? Does the shop you work at feel like they value your effort towards quality?


Roders are some impressive machines. Wonder what kind of accuracy the machine is capable at that velocity.


Image originates from this video by OSG..

https://www.youtube.com/watch?v=u286ZNupi8M

The material being cut is PEEK Glass-Fiber 30%. It looks like it's fixtured to a Delrin block some how.. Any ideas on this black magic?

Glue? Threaded from the bottom up?
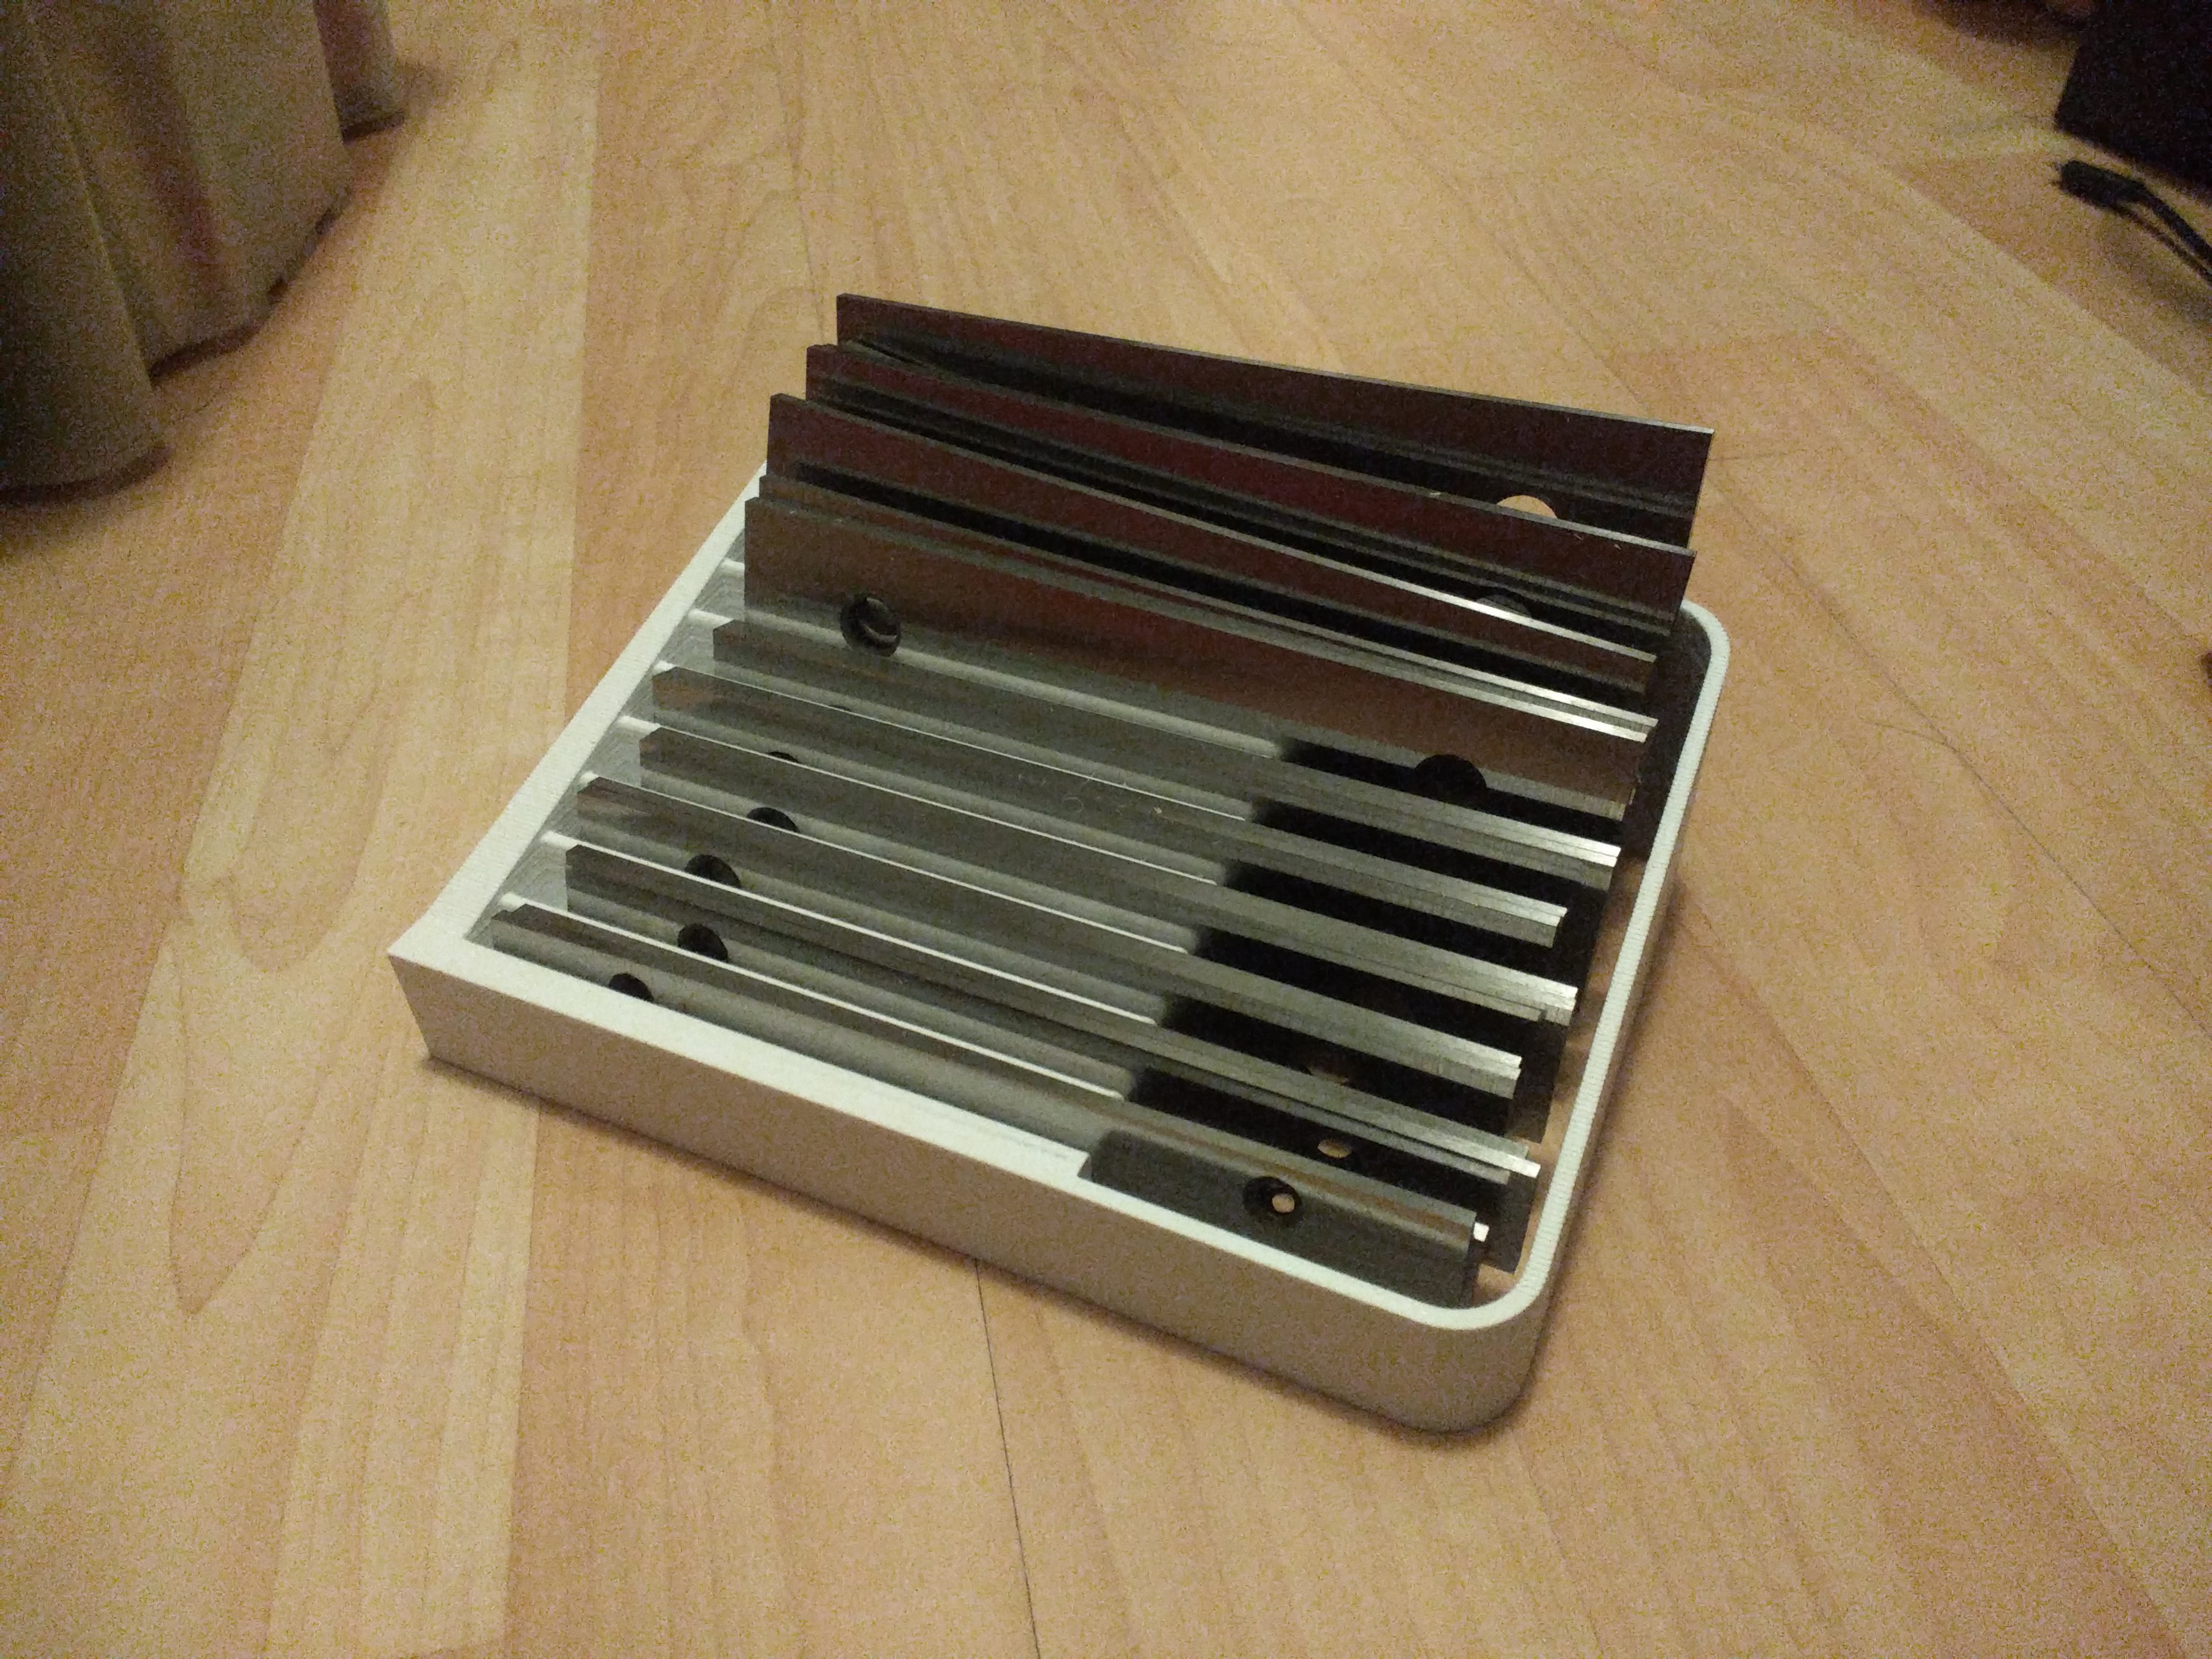
 

Running into a dilemma...

I have no trouble ending up with an accurate finished part with really tricky features.

BUT...BUT I can't figure how to quickly develop a roughing strategy. I'm always doing short run items so I don't have many opportunities to be hogging out material repeatedly. So, when I get a 1pc job that needs a lot of material removed, I'm very slow.

To a point, where I'm getting micromanaged.... on roughing.

I'm inclined to be safe and prioritize process stability over Material removal rate. For example in HEM, Instead of doing 10% stepovers, i'll do 6%. In turning, I'll keep DOC down on the bottom left end of recommended specs instead of burying past the insert radius. I don't get off on huge MRR like others, my moment of glory is hitting incredible tolerances on a difficult design/material.

What really scares me is... that a mistake in roughing parameters comes with bigger risk than just "tighten the bolt until it loosens up and quarter turn back". It's the part becoming a projectile/scrap, machine damage, and at worst an injury. Lathe work where I have only a fraction to hold onto and inches of material to remove....

How have you developed a 'sense' for how aggressively you can rough?


Following the prior Lemmy post about towels...

I wash once a week, is that sufficient or need I more frequency?


6.875" x 5"

I used to lug the shipping crate of a case around but I needed all the space I can get in my toolbox. Also tried to make this a one-handed design. Press down into the cavity with my pinky and pick up what I need with the index and thumb.

https://www.printables.com/model/657221-compact-organizer-for-6-machinist-parallels


I'll be keeping this one in my toolbox of "out of the box" solutions.


I'm in a situation with my manager who is suggesting that clock-in starts when the employee arrives to the site of work. Effectively saying that everyone should be coming in 15 minutes earlier than their start time.

The majority of what I read online was about security checks when leaving the premises instead of entering. And the results of a couple class actions seem like the law has loose interpretation.

Wondering what your experiences have been like dealing with this situation. Are you paid for your time traveling on company premises?

For ref this takes place in California.


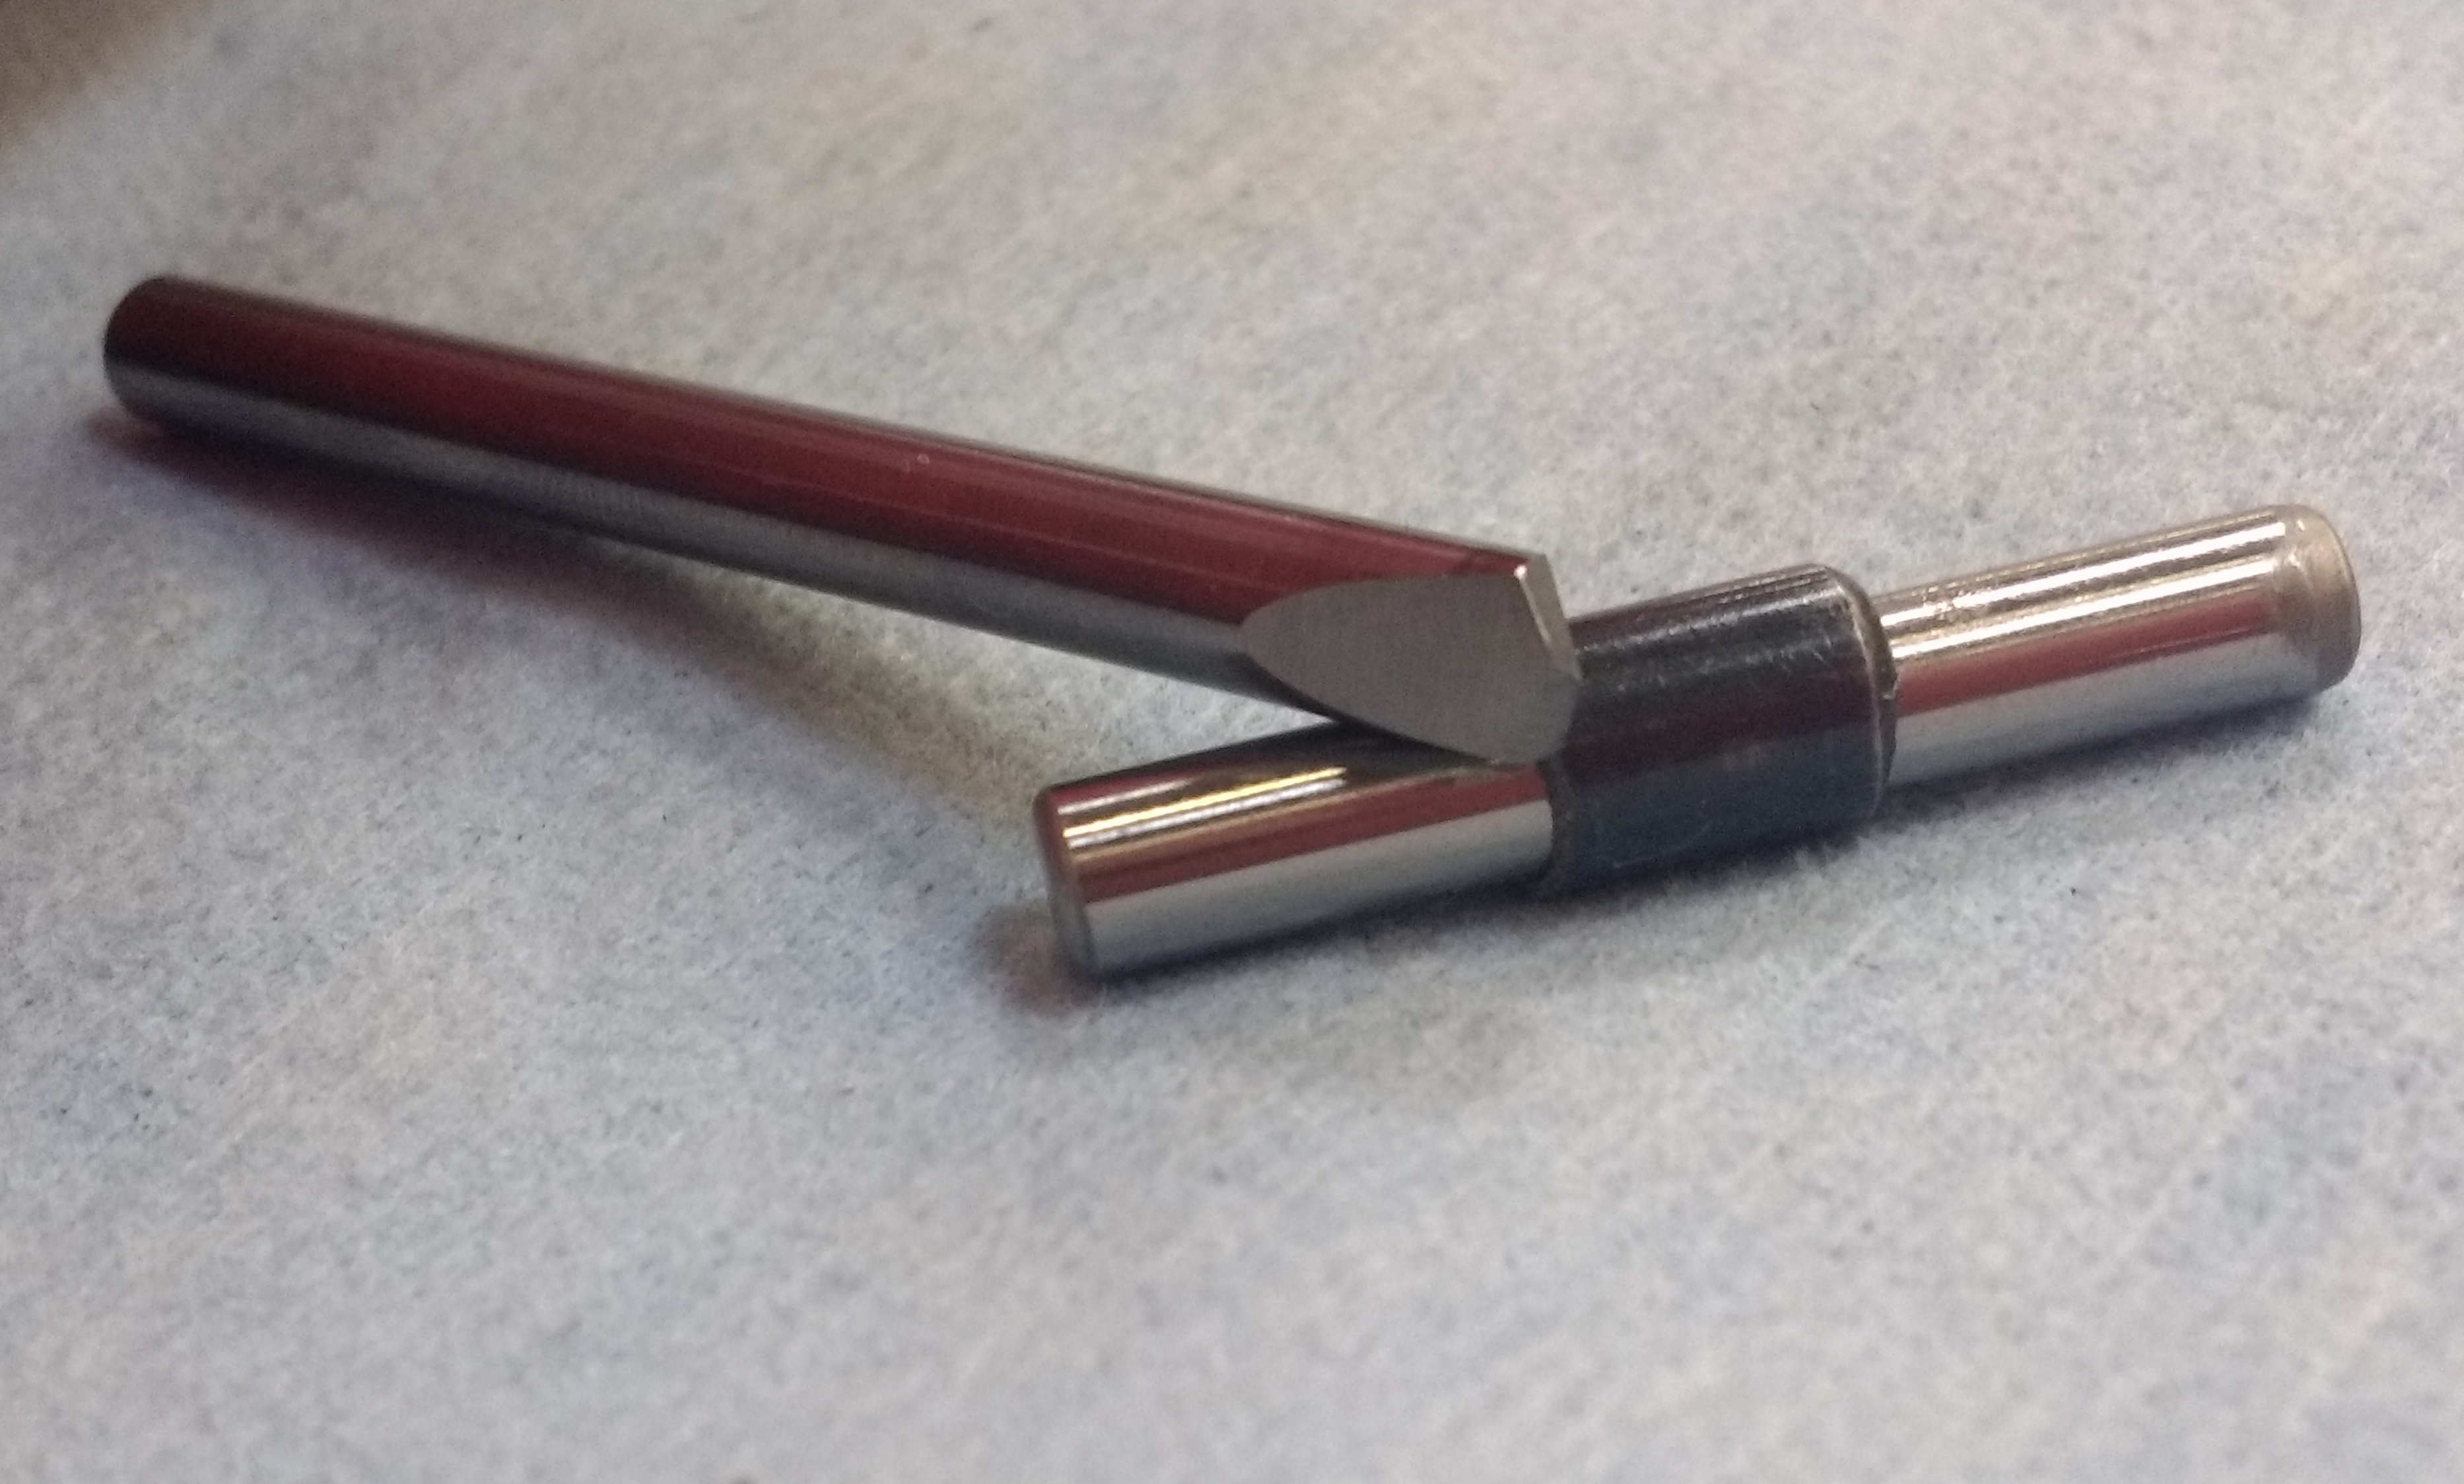
Only 4 geometries to grind on a broken carbide endmill shank and you can drill out hardened steel.

Inspired by Sandvik hardcut and OSG tap extracting drills

https://www.amazon.com/dp/B0055860LA

https://www.osgtool.com/exocarb-xh-drl-drills-5172


Nandert is in my opinion the best channel for Los Angeles county metro projects.


I've owned the DT 1990 Pro for a couple years now and it's absolutely the best set of headphones I've ever used. But fairly recently the creaking issues that many other users reported have crept up to me.

https://imgur.com/Tvxdfqa

https://imgur.com/X9aIbz8

https://www.head-fi.org/threads/beyerdynamic-dt-1990-pro-beyers-open-back-mastering-headphone.814629/page-93#post-13962732

Basically anytime I moved my head around I would hear what sounded like a piece of plastic being rubbed against another piece and causing creaking noises. I tried to tolerate it but alas it was too much.


The Problem

The molded plastic of the earcup and the plastic frame of the driver are sitting in a way to cause minute rocking when the headband flexes the earcup from head movement. Imagine the outer plastic as an ellipse and the driver as a circle within the ellipse. The circular driver will be free to rock within the ellipse shape of the outer plastic. Even if the driver finds a point to settle, flex introduced into the cans via headband will cause distortion which forces displacement of the drivers causing creaking.

Although, perhaps the driver isn't meant to be 'over-constrained'... To explain further, the retaining ring clips on to the earcup and compresses the foam pad and driver which also has a soft pliable material glued to rest against 3 prongs on the ear cup. This technically prevents the driver from flying about in the earcup. Where it gets over-constrained is from the frame of the driver making many many point/area contact around the earcup. Thus causing a binding condition to occur.


Solution

One purported solution was to loosen the two T6 flat head screws that hold the earcup. This reduces the amount of earcup flex caused by the headband which does reduce the amount of creaking but will not eliminate it all together.

The solution then is to restrain the driver within the earcup in a way it wont creak.

You'll need to take it apart to access the driver.

Dissembly

  1. Remove the earpads, plenty of videos on how to do this but all it only takes a light pull to remove it. random 3min YT video

  2. Unclip the retainer. I found it easiest to wedge a flat head down into the smallest of the 4 tabs. Small push no prying. See image. https://imgur.com/20dG9Ma Once one came out the rest came out easily.

  3. Now you'll have access to the driver. Mind the location of the key and push down around the driver. It didn't take much force to cause the creaking. See image https://imgur.com/Qb4V1lJ

On my particular headphone I noticed an up-down creak (relative to the picture).

  1. To remove the driver, place your hand over the driver in preparation to catch it then flip the earcup over. It should just drop out. A couple taps was necessary for me.

  2. Shim one side where the creaking was the worst. I chose to use a piece of teflon tape, it's thin and I suppose the reduced friction helps? The plastic frame of the driver is fairly skinny so I cut the tape in half.

This is where you might have to take it differently since your earcup/driver dimensions&form(shape) will be different. I did consider taking a file to it and shaving off a bit around the perimeter so the driver isn't over-constrained but I didn't want to go that route unless necessary.

  1. Put it all back together.

Conclusion

It was fun looking for a solution. Root cause analysis is something I attempt do all the time as an R&D machinist.

It's a huge relief to not have to put these headphones away either. Since these are the most priciest set I have.

Let me know if this worked out for you.

view more: next ›